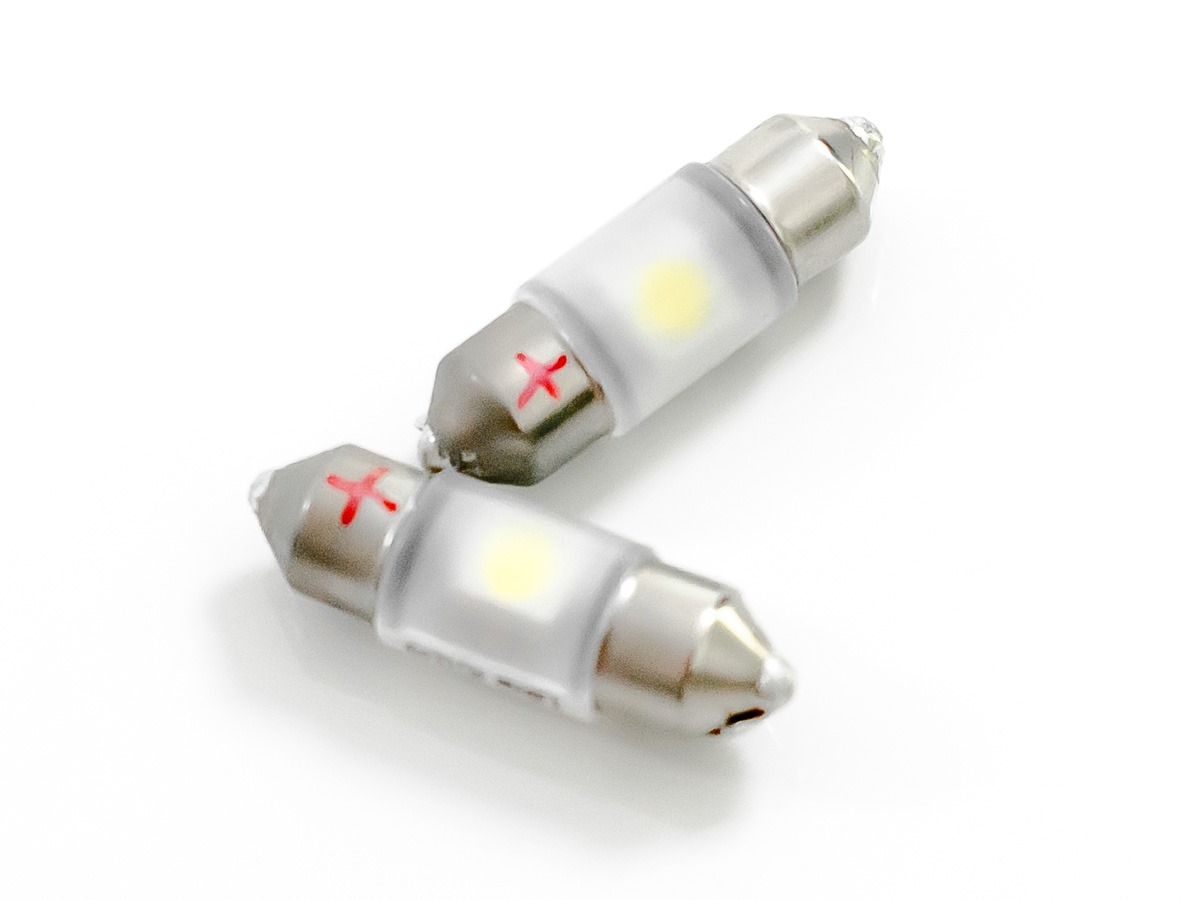
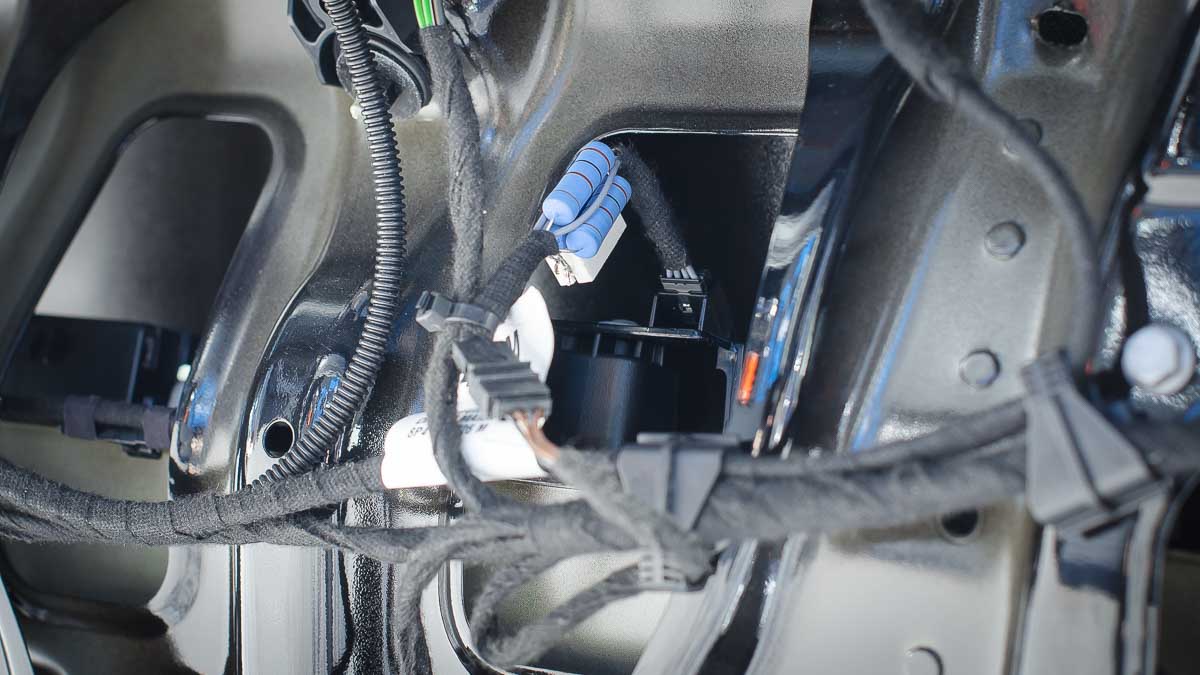
In this article, we change the Audi A3 number plate bulbs to LED’s and get rid of the number plate light warning that follows.
Xenon in the front and 200-year-old filament technology in the back. Car’s incandescent number plate lights have annoyingly short life-span, they are frustrating to change and after a while impossible, when the soft mounting screws start to rust.
Disclaimer: Please note that everything you do to your car is your responsibility, not mine.
Info in this article is valid but people make mistakes.
Safety: Shorting the exposed wires might result in burnt fuses or a fried on-board supply control unit, disconnect the battery (negative lead first) before taking anything apart.
Legal: Car lights are highly standardized, using custom non E-approved parts might be illegal.
The car in this article is a 2010 Audi A3 Sportback 8PA 1.9 TDI, but the procedure and wiring should be applicable to most cars, especially other similar age Audis and Volkswagens.

Installing LED Number plate lights
Tools and materials needed
You will need basic mechanical and electrical tools. A trim-remover is handy to loosen the spring clips while removing the rear lid trim to get access to the cables.

- Two LED-festoon LED-bulbs
- Resistor adapter for licence plate LED or 25 ohm >10 W resistor
- T-20 Torx-screwdriver
- Zip-ties
LED Number plate bulbs
Installing LED-bulbs in the place of regular filament ones is pretty straightforward, it is like changing the bulbs normally with two key differences:
- Lights are directional, they have to be oriented right
- LED-bulbs have a polarity

After you take your shiny new LED-bulbs out of the package, hook them up to a 12 V voltage source and mark the positive end with a marker.
Install the bulbs to the covers, so that the positive end faces away from the screw hole.
In my car, I used 6000K OSRAM LED-bulbs that roughly match the front Xenon- and LED daylight running lights in color-temperature.
Audi bulb warning light
A warning is shown on the dashboard when the car thinks the number plate light has a broken filament.

The car’s computer measures the current going to the light bulbs, if the filament is broken, this current drops and the familiar bulb-warning appears on the dashboard. This is called light cold diagnostics.
Usually, this is awesome and keeps you from getting a ticket but this approach is problematic with LED-bulbs. They consume so little power that the computer thinks there is something wrong, even when the butt of your car is shining with light!
On some models, it’s possible to turn off the cold diagnostics from software by changing the electrical system’s long coding using VAG-COM cable and VCDS but on my selected vehicle this is not an option.
Getting rid of the number plate light warning
If modifying the car’s software is not an option, we can always make the car think there is a light bulb connected with a properly sized resistor.
I tried 100 Ω, 50 Ω, 33 Ω and 25 Ω, the last one being the only one that worked.
A 25 Ω resistor in a 12 V circuit will have about 480 mA going through, emulating about 6 W light bulb.

Connecting a resistor in parallel with the LED-bulb makes more current run in the light circuit, making the computer think there is an intact filament.
Please note that when going this route you will have a heating component inside your trunk-lid (mount it properly) and you will never get another number plate bulb warning again.
Installing a load-resistor
The proper way to install the load-resistor would be to put it in the wiring harness just before the connector leading to the handle/lamp carrier. This provides easy access and good mounting options for the resistor.
Mount the resistor in the air so it can cool properly and make sure it’s not touching any plastics that could melt.
Use secure connection methods like soldering or crimping to connect the load resistor to the wires of the harness.
The load resistor needs to be connected between:
- Pin 3, number plate output from the J519 (gray with brown stripes)
- Pin 4, ground (brown).
The schematic above has been drawn based on the Audi A3 wiring schematic, which according to Audi is valid for 2006-2010 A3 models.
Problems
I first tried to solve the number plate warning problem by adding 100 Ω load resistors inside the lights, so I would not need to take apart the trunk lid.
It is tempting to make this kind of installation but its worth doing the right way. Installing the resistors this way you will be dumping a lot of energy into the small plastic enclosure, which in my case has lead to the softeners being vaporized away from the plastic and causing them to crack.

Bad installation 
Cracks in plastic
The resistors also took too much space, the LED-bulbs had to be installed off-axis of the lens and the lighting pattern to the number plate was off.
What did not help either was that I put a too high value of resistors in there that were not enough to trick the computer so I ended up driving with the warning light on for a year. Number plate bulb warning hides the car’s thermometer on the screen and that shit is important in the land of ice and snow so I decided to fix it.
Pro-tip: Do not close trunk if you have removed the switch to open it.
Taking apart the rear lid

The plastic trim of the rear lid is held in with two T-20 Torx-screws and 8 metal spring clips.
Carefully release spring clips from the rear lid on the right and left edges of the trim and carefully pull trim off. Reach between the trim and rear lid and disengage other spring clips.
Assembling the rear lid is the same but in reverse order, attach the center spring clips, then the sides and finally the screws.
LED-adapter cable
After messing with the lights enough, I decided to set everything back as it was and go ahead with the second method:
I ordered a ready-made adapter cable from Amazon that has the resistors built in between two suitable connectors.

This makes installing (and removing!) the load resistors accessible enough for any moderately trained monkey, without damaging the original wiring harness.

Side note: People keep selling these adapter-cables as “CAN-bus compatible” which I find funny as there is no CAN-bus going to the rear lid number plate light/switch assembly.
I just pity the fool who installs one of these in the CAN-bus!
The adapter has three 100 Ω resistors connected in parallel to make up one 33 Ω power resistor. I still had problems with it but after some trial and error, I determined that it took 25 Ω resistor to trick the car computer.
I modified the adapter by adding one 100 ohm resistor more in parallel to drop its total resistance down to 25 Ω.


Bonus: Restoring the plastics
The screws keeping the light-covers in place were rusted so badly I could not take them off with a screwdriver anymore.
I had to cut the heads off with a small cutting-wheel and drill the rest. This damaged the plastics a little but this was nothing that a little epoxy would not solve. I guess European cars are not meant for heavily salted arctic/rainy Finnish climate.
The plastic covers had also gotten a bit cloudy so I decided to resurface them on the same go. This can be a simple fix:
- Fix any cracks and weirdly miss-drilled holes with 15 min epoxy
- Use emery-cloth on the glass to flatten the surfaces by sanding them
- Use spray clear-coat to transfer the matte-finish into translucent plastic again
- Let dry
- Use stainless steel screws in the future
Conclusion

This little mod was a fun afternoon build and took care of the problem for me. The car no longer complains about the “broken” number plate lights.
Verdict
- Driving with error-light on will make your passengers think less of you
- A thermometer is surprisingly important in a car up north
- Save effort, do it right the first time


2 comments
Hi there,
Great post – really informative and well written.
I am currently in the same position as you, having installed genuine LED rear number plate lights and being presented with the warning light on the DIS. I have an Audi A3 8P 2009 model.
I bought and installed the kufatech loom as you did, but unfotately this did not remove the light warning error. So as I also do not have access to VCDS, nor am I sure I can remove monitoring due to my module version, I need to modify the loom to include a new resistor.
Could you please explain how you managed to modify the loom to include the additional resistor? I am fairly new to wiring work, but this seems a simple task with some clear instructions.
Thanks for the great posts and thank you for any assistance.
Kind Regards,
Lewys
Glad you like the article 🙂
I just added more resistors in parallel with the ones in the adapter to make the bulbs appear to take way more power. Note that you need relatively high wattage resistors or they will let the smoke out.
If I remember correctly, you can disable that bulb diagnostic on a 2009 model with VCDS, on my 2010 it’s no longer an option. In your case I’d borrow a cable from somewhere or bribe the service guy.
If you wanna play more with your car’s wiring, I recommend to buy the 2000ish page schematic for your model from Audi’s erWin portal, it has helped me quite a bit! Also there you can get all the service manuals for your make and model for the same price if you download them quickly.